Christmas is one of the funniest moments to decorate the house. It is possible to make everything from more classical decorations to inspiring themes of series, books, and films. The possibilities are huge! So how about creating your own small crochet Christmas tree to start your decoration in your own way?
These trees, like most crochet ornaments, can be very colorful, funny, and unique. It is important to point out that they are used to hang in a real Christmas tree.
You should even invest in other crochet Christmas ornaments. After all, these are quick and cheap pieces.
Christmas Crochet tree ornament inspiration
As we said, from crochet, it is possible to create several models of ornaments for the Christmas tree. Thinking about it, we brought some inspirations to you and in the end, there is a tutorial for you to make your first Christmas tree.


Tutorial to make a small crochet Christmas tree
For you to create your first garnish, we have brought an extremely easy tutorial. With a little imagination, you can modify the design, add details, play with the colors, and create a modern and new piece.
Materials
- 1 Crochet candlewick in green color;
- a crochet hook (USA – letter D / UK -11).
Performance
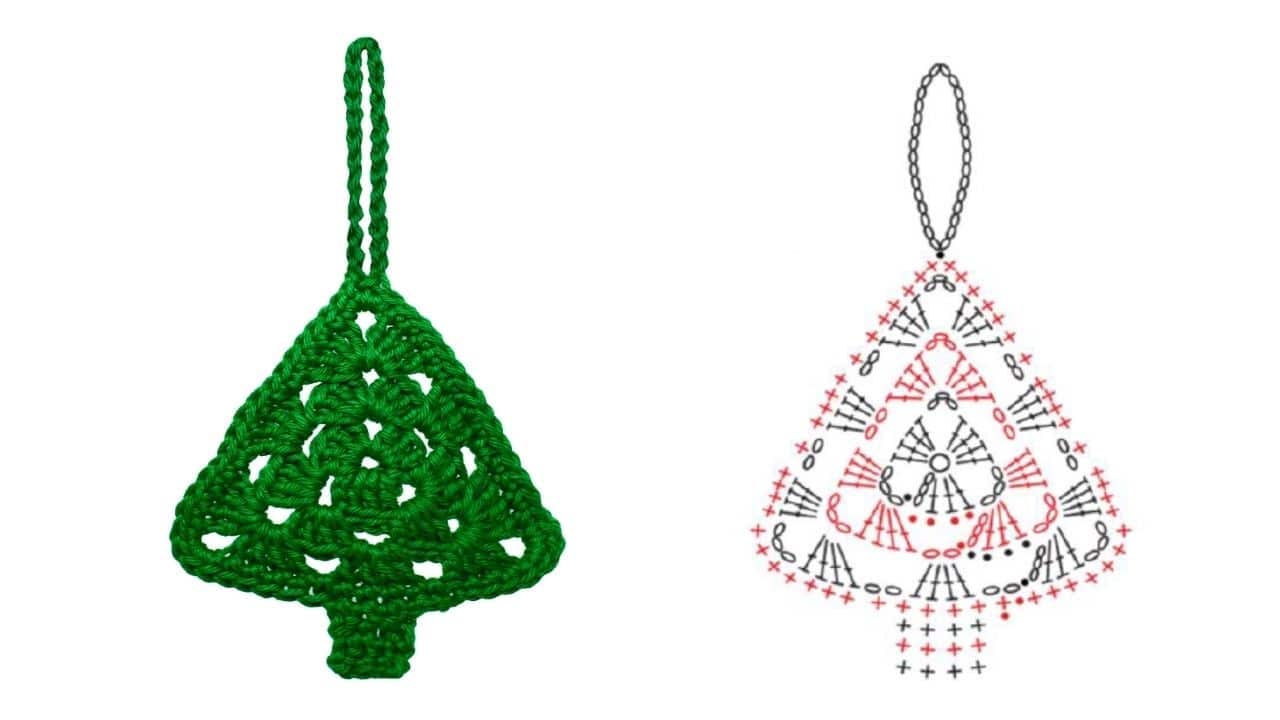
To start your piece, make a magic ring. After that, to make the first row (as well as all the others), you must do 3 chains. So you will be able to make your first “double stitch” in the row.
Next, do 3 times the sequence of 4 double stitches and 3 chains (always remember to consider the three chains as your first double stitch) inside the magic ring. Then close this step with a slip stitches in the third chain of the first stitch.
For the second row, make 4 single stitches until you get to the first chains you had done after the first 4 double stitches. In the gap of chains, make 4 double stitches, 3 chains, and 4 double stitches. After that, make 3 chains and repeat this sequence to the end.
In the third row, you should make 4 single stitches until you reach the gap of 3 chains. Next, make 4 double stitches, 3 chains, and 4 double stitches in the gaps corners chains of the previous row. Also, make 2 double stitches in the side gaps. Separate all blocks with 2 chains.
For the fourth row, make single stitches all around the round and close with a slip stitch. For the stem of the Christmas tree, you should do 3 rows with 4 single stitches on one side.
Finish the piece by making a chain with 30 stitches on the top of the Christmas tree. Then close with a slip stitch to form the rod you will hang the garnish for.
Finally, cut the spare yarns and there you go! Your small crochet Christmas tree will be finished! Certainly, it will make her Christmas tree even more beautiful.